Sunday 29 October 2017

ICM 1/35 ZiL-131

I've made pretty good progress (for me anyway) and the chassis is now built. I wanted to turn the wheels to add a bit of interest however the steering is fixed straight ahead only, so some surgery was required;


The steering knuckles were removed as shown in the bottom picture then drilled at the back using a 3.5mm bit. Two sewing pins with the round plastic ends were cut down in length and holes were drilled either end of the axle for these to go in;


The insides of the steering knuckles were packed out with two small pieces of 0.20" styrene as the depth is too much. The knuckles were then glued into place and the steering rack and angled arm on the chassis side were modified to suit the turned axle;


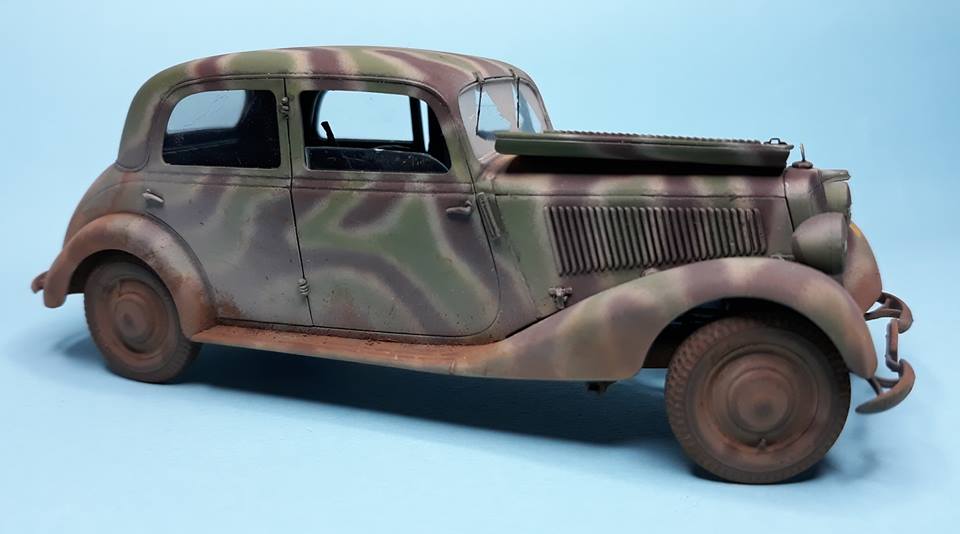
I'm quite happy with that as turned front wheels add to the look of a vehicle.
A couple of points to note so far in the build and that is part A48 actually fits HERE;


Not where it says on the instructions. Also I've found the plastic is pretty fragile in this kit which makes cutting smaller or thin parts off the sprues tricky as a couple of them have broke.
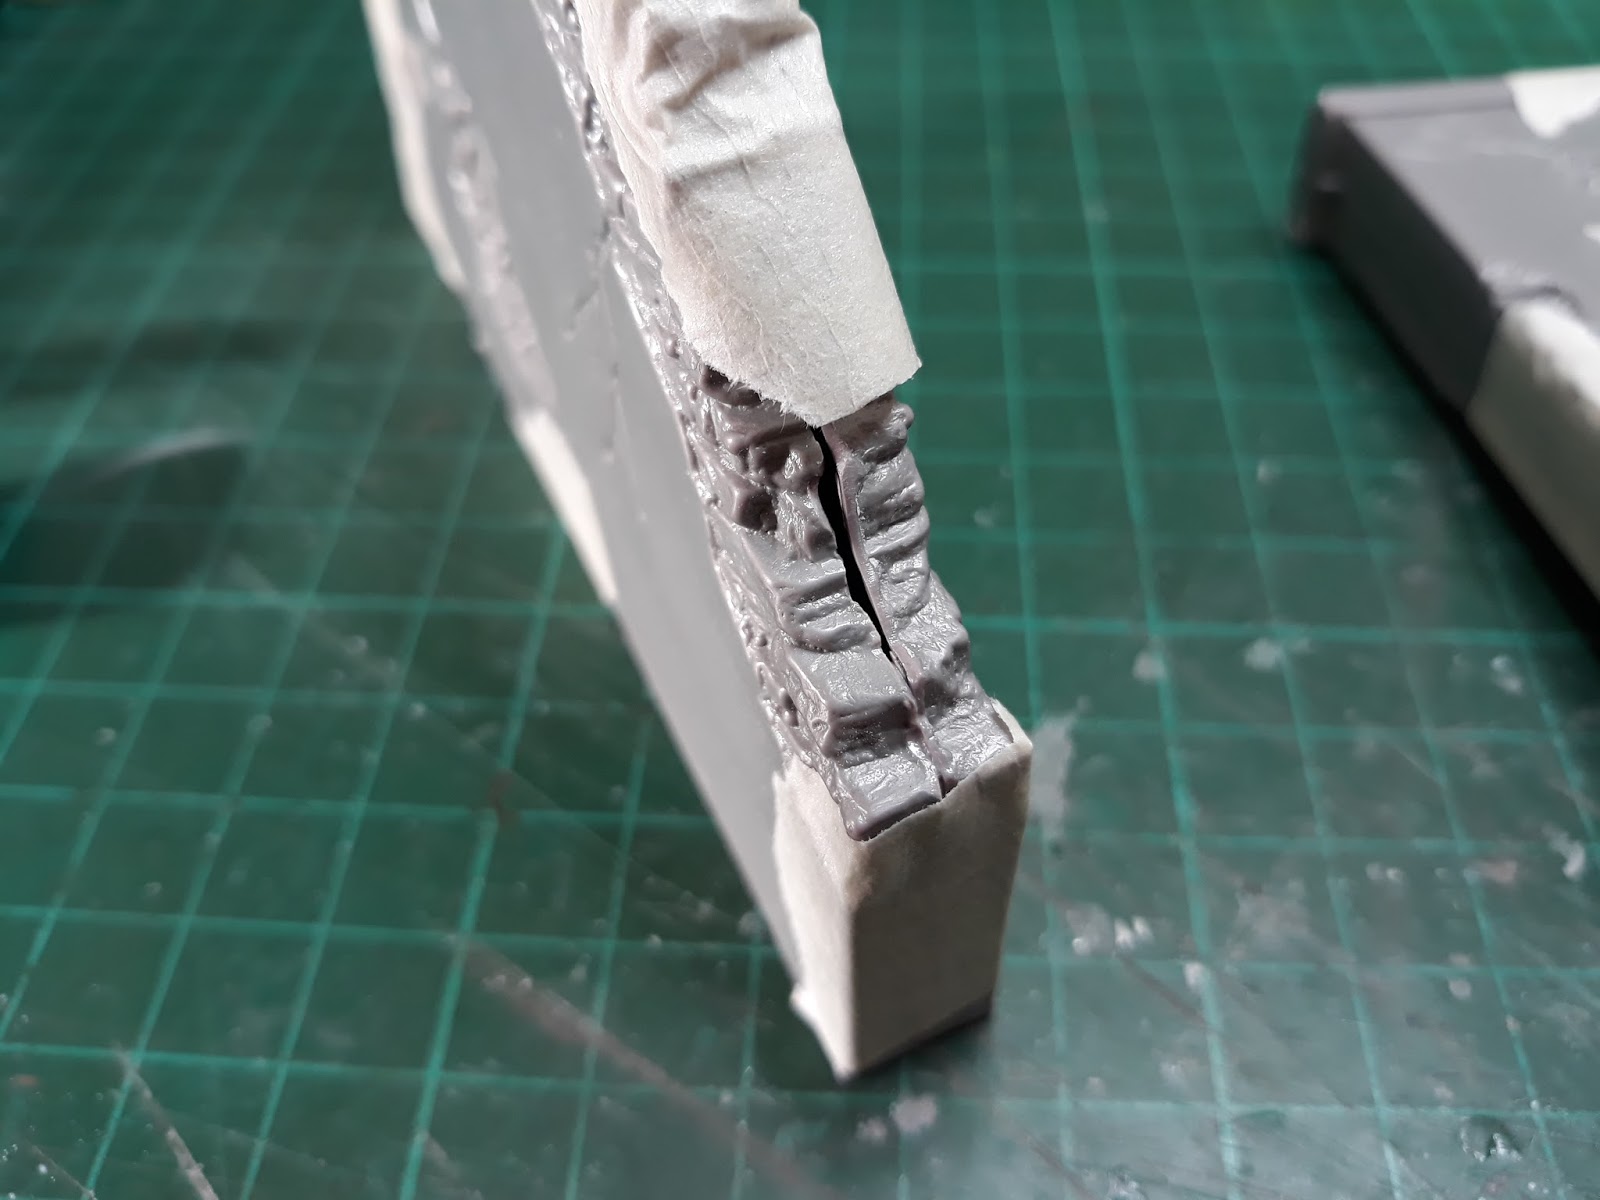
Bearing this in mind and noting the cab windscreen frame was attached in three places I used a razor saw to remove it from the sprue and the excess was removed with wet and dry paper.
The completed chassis;


Wheels are by Def Model. Detail-wise this is as far as I'm going with the chassis as I don't want to spend any longer on it, I just felt that the fuel tanks are pretty prominent and needed some TLC.

Friday 27 October 2017

ICM 1/35 ZiL-131 truck

I was up in the loft the other day sorting out stuff when I found a Def Model set for the ICM ZiL-131 so in between the Leopard and Hurricane I decided to build this for shits and giggles. The intention was to build it straight out of the box.....aaaaaaaaaaaaaaaaand then I found some piccies online via Prime Portal (I know I just had to look) so I've added some detail because I can't help myself;


The chassis is made up of multiple parts so the top picture shows the weight I put on it to keep it flat and straight. This is essential with multi-part chassis's otherwise it leads to fit problems later on and of course wonky wheels.
Generally the kit is OK so far with a good fit of parts however there are pin marks and sink marks here and there which need attention, flash is minimal with just seam lines needing to be removed on parts.
This will be another ongoing project so there is no time frame in mind, it just keeps my mind occupied.

Friday 20 October 2017

Miniart Farm gate with base

The diorama has served its purpose for the review I did for the Lifecolour paints so after playing around with it for experimental reasons I've put it to one side. Maybe I can use it for something at a later date but anyway here's a couple of pictures showing what I did with it;


I was quite impressed with the Lifecolour paint to be honest as I did try brush painting it a few years ago and wasn't very impressed with the coverage, however I had no issues putting it through my airbrush so I'll look at this brand again.
By the way for thinning the paint I had to use Vallejo Airbrush Cleaner as I didn't have any Lifecolour thinners and with that and a few drops of flow improver the paint sprayed very nicely.

Thursday 19 October 2017

Miniart Mercedes Personenwagen

I had a bit of a blitz with a couple of projects today and I'm calling this one finished. I was going to do a small diorama but I just ran out of steam with the model and just wanted it done and off the Shelf-of-Doom;


I have to say the kit itself is lovely and I did enjoy the build.

Takom Leopard C2

I started to apply the decals today but hit a snag in that the carrier film on the kit decals had a 'milky' consistency;


Also it was pointed out by a former Canadian Leopard commander that the right-hand decal is incorrect in that the symbol represents a mechanised infantry unit rather than an armoured one.
So the two decals have been removed however it now changes my plan on doing the specific Leopard found on the Prime Portal walkaround site. Luckily I have an Echelon decal sheet for Gagetown Leopards (where crews are trained) so it will have to be in those markings instead. Bugger......
I hope the decals in other Takom kits are better!

Wednesday 11 October 2017

Airfix 1/48 Hurricane Mk I

After me raving about the Vallejo Surface Primer a week or so ago I've had an issue with it in that trying to rub down the joints that needed filling, the primer has just peeled off;


It's as though there is no 'bite' to the primer whatsoever. I've since received some advice as to where I might have gone wrong (applying it too thickly instead of thinner coats, not letting it cure for a long enough period) so I will reserve judgement and experiment further on an test piece.
In the meantime I washed it all off using IPA (Iso Propyl Alcohol) and will go back to the Games Workshop rattle cans for now. I have to use white as the areas for the national markings will be masked off prior to painting as dark paints will only show through the decals.
Also the primer had to be removed as I'm not sure what reaction would occur between the Vallejo and putting the Games Workshop stuff over the top (probably a bad one knowing my luck).
Bugger.......

Edit;

After cleaning up the wing root joint again the model was sprayed with Games Workshop Corax White (which isn't white, more an off-white for some reason) and this time it's worked;


Now I can get on with applying masks for where the national markings will be and painting the thing. Finally!


Tuesday 10 October 2017

Miniart Farm gate with base

Well I managed to glue it all together but it's taken a LOT of work to get it to this stage plus a lot of filler to hide the gaps. The biggest problem was actually getting the kit halves to stick together as the plastic seemed pretty impervious to liquid glue and because it was a vac-form the mating edges are very thin. The styrene strips I added helped to a degree but it was still very easy to flex the parts and crack the joints, also the the joints seemed to 'flare out' to the middle which made filling difficult.
Copious amounts of superglue finally managed to stick the walls and gate to the base so it's now being left to set before I undercoat it;

The doors were glued shut with the hinges added after. I left the smaller door ajar and added the handles from wire along with a strip of styrene down the front;


As I said in a previous post this is mainly to test out some sets of Lifecolour paints I got for review so I'll post a pic of the finished piece...that's if it doesn't spring apart before hand....

Monday 9 October 2017

Takom Leopard and Airfix Hurricane

The Airfix Hurricane received a coat of Vallejo Surface Primer the other day to show up any flaws in the wing joints and it did exactly that;


As you can see the joint is not brilliant and needs some more filling, after which the model will get another coat. Also the model will require a light sanding as lumps of primer attached themselves to the surfaces as they shot out of the airbrush.
The Takom Leopard finally got the base coat on using a mix of Tamiya XF-67 Nato Green, XF-65 Field Grey and XF-57. Prior to spraying the base coat I went over the black primer with grey, lightened more for the top surfaces;


The base coat was mixed in a 3 parts Nato Green to two parts Field Grey ratio with some Buff thrown in to suit, the mix being very kindly supplied by Anthony Seward who commanded a Leopard C2 in the Canadian Army;


The paint looked a bit too bright but after a coat of Tamiya X-22 Clear it altered the tone somewhat;


So now I have a shiny (ish) Leopard after a mammoth spraying session. The decals will be put on and a pin wash applied before spraying it with matt varnish as a glossy surface helps the flow of paint when applying pin washes.

Thursday 5 October 2017

Miniart 1/35 Farm Gate with base (Kit Number 36034)

I recently bought this as I need to do a demo of some new Lifecolour paints for a magazine review. I've never had one of these kits before so I thought I would do a quick build review for my blog (you will see it painted but photo's will be limited due to the mag).
The kit is actually vacuum formed and after my experiences with this type of model I knew what pitfalls were ahead. Firstly the parts were removed from the backing sheet by flexing the sheet until the parts broke free although I had to cut some away due to their placement, then they were given a clean up.
With vac-form kits you often get thin areas where the plastic has stretched over the mould particularly on corners and this model is no exception so car filler was used to pack out the thin areas for strength;


I added strips of styrene sheet to the inside edges to help keep the joins flush;


The assemblies were then glued together with lots of tape to hold them together;


The joints are not the best on this kit and will require some serious filling before I can paint it;


On the whole it won't look THAT bad after putting some effort into it but for buildings in dioramas I think plaster cast ones are better, still it looks quite pretty on the box;


Wednesday 4 October 2017

Airfix 1/48 Hurricane Mk I

The build is now complete and the model needs a clean before applying the primer coat. Before the main gear was painted I added the brake lines using copper wire and small strips of masking tape to represent the fasteners that hold the brake lines to the door. The wheels are Eduard Brassin items.


Although you can get pre-cut canopy masks, for simple framing like the Hurricane it's just as quick to do it yourself using Tamiya masking tape, a cocktail stick (to define the tape around the frame), a fresh scalpel blade and a steady hand. Care is needed as I have rescribed canopy framing before now...oops!


Once the transparencies were masked the windscreen was fixed into place using G-S Hypo Cement. This stuff is mainly used by jewellers for repairs but it's great for model canopies as unlike superglue it doesn't fog plus I find it stronger that PVA type glues such as Krystal Kleer. You can eliminate the fogging of clear parts by dipping them in Johnsons Kleer and leaving them to dry however I'm going off the stuff personally.


The wingtip navigation lights were drilled into then drops of Tamiya clear red (for port) and green (for starboard) were put in to simulate the coloured light as the covers were clear.


All I need to do now is mask off the wheelbays, cockpit and windscreen, clean it down and get some primer on to see if I really have made a good job of those wingroots.