Wednesday 28 March 2018

The things you find (pt.2)

I was in the loft earlier looking for 1/72 ejection seats for the Mirage IV when I found this Aeroclub vac-form conversion for a 1/72 Fairey Gannet AEW;


I started to seriously think about putting it together as the Gannet AEW has been another on the modelling bucket list for a long time so I mentally started to cut the fuselage from the backing sheet and then see if the Revell 1/72 Gannet wings would fit (the conversion set was based on the ancient Frog/Novo kit).....until I had a feeling there was something else in the stash that would save an awful lot of work.....


D'OH! I had completely forgotten all about the 1/72 Sword kit I had bought a couple of years ago....idiot! :oD
I'll blame it on having a 'senior moment'

Tuesday 27 March 2018

Heller 1/72 Mirage IV

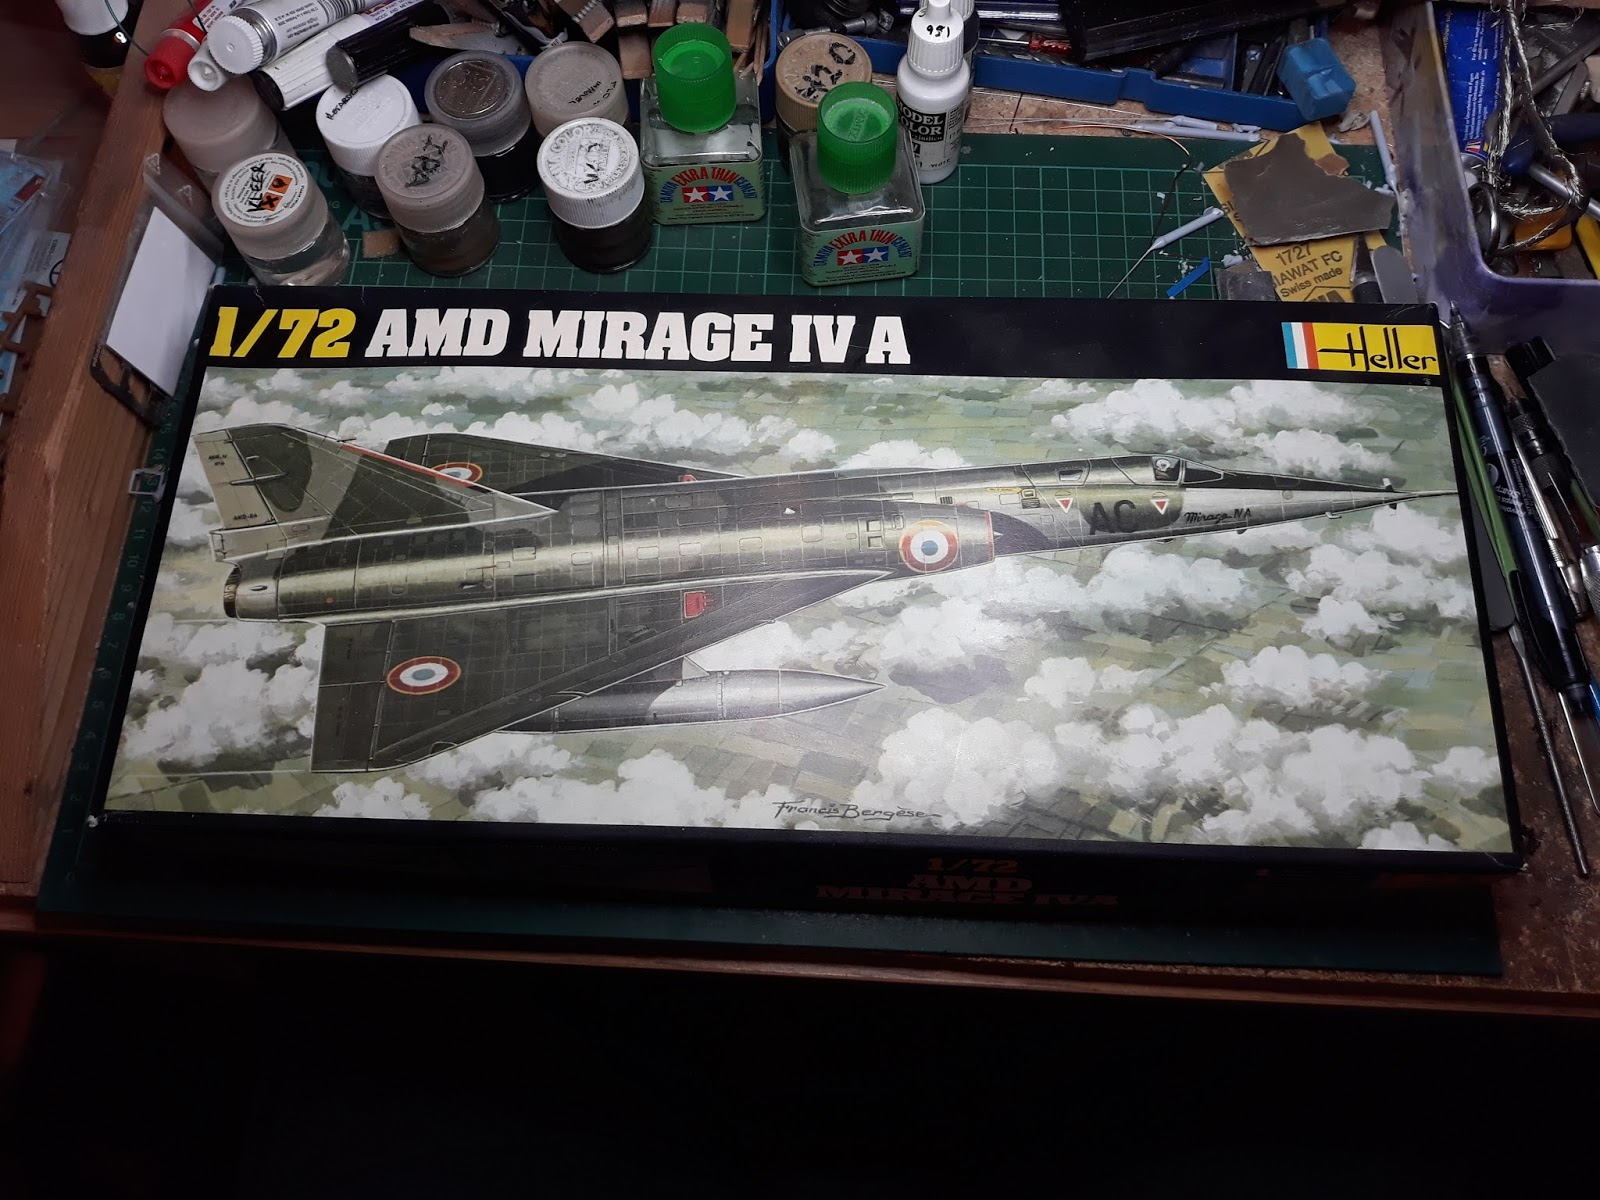
It's a late one for me tonight and with the family asleep I'm unable to do any spraying on the other projects I have on the go so to save falling asleep myself I've decided to make a start on the old Heller 1/72 Mirage IV.
I've had this kit in the stash since 2001 (I keep a book for this type of thing) so feeling the need to revisit the scale where I started this hobby and the fact this kit was staring at me from the pile recently I've dug it out.
I have some resin bits to add such as a BOZ-103 chaff dispenser, a CT52 photo-reconnaissance pod and a ASMP nuclear missile plus a decal sheet from Model Art (no.72057). I got the nuke and recon pod as I couldn't decide which to add although I think I may be leaning towards the recon pod.
At the time of purchasing the kit these resin parts and decals were not available and probably why the kit stayed in the stash for so long. I won't be super-detailing the cockpit as the canopies will be closed and you won't see very much so technically it should be a pretty quick build...LOL!


Edit; Having said that and after a couple of hours I've more or less ended up with a virtually complete model!


Considering the age of the kit the fit of parts has been very good, all I've done so far is sand down the tail cone for the exhausts as the aerofoil section at the top featured some sink marks. Sanding it has also reduced the thickness of this bit too.
The rather basic cockpit has been assembled and glued into place and will be painted later on because as stated above you won't see very much of it as it is entirely black in the real aircraft. What I will do is find some Aeroclub Martin Baker ejection seats I have in stock as these will provide some interest for what you will be able to see through the closed canopies.
When the model is completely set I will rescribe the panel lines as these are raised on the kit, also the oversized rivet detail will be removed and possibly be redone using an RB Productions riveting wheel set although due to the scale of the model I might leave it. I shall decide on this later on as well as think about dropping the elevons, also one thing I do need to add is some weight in the nose as the model is a definite tail sitter.
With the decal sheet I have I may finish the model as the Mirage IV that was on static display during the 1994 International Air Tattoo at RAF Fairford as that was the only time I ever saw one of these impressive aircraft;


Airfix 1/48 P-51D Mustang

The model is finally up to the spraying stage so tonight I gave it a basecoat of Tamiya X-18 semi-gloss black to prepare it for the Alclad paint that I will be using later. Current wisdom states that you should use gloss black for Alclad finishes but I didn't have any in stock so X-18 is as near-as-dammit, also some folk don't like primer coats but I'm glad I did prime the model as it has shown up some areas that need attention before the final finishing coat goes on;


I've never airbrushed Alclad before so I shall practice on an test subject first rather than risk buggering up the P-51.

Monday 19 March 2018

Airfix 1/48 P-51D Mustang

I've begun to start getting this on the home stretch and today I sprayed the canopy and windscreen interiors, the wheel wells and gear bay doors. Once the windscreen is in place I can then start spraying the whole model;


Edit; after painting the wheels well and gear doors with ZCY (Zinc Chromate Yellow) I've decided to repaint them with the interior green mix I've used for the cockpit. This was due to a conversation with a fellow modeller and finding a pic of the P-51D I'm basing my model on;


This is P-51D 44-14868 'Hurry Home Honey' assigned to the 364th Fighter Squadron, 357th Fighter Group. Looking at the pic it appears to me that the starboard gear door interior is quite dark, especially when you compare it against the checks around the nose as these were yellow and red (the lighter tone in the pic is yellow) so my guess is that the interior colour would have been green;


I found this interesting piece along with the photo of 414868 that explains the heavy exhaust staining on the fuselage;

'44-14868 P-51D flown by Major Peterson at the end of his second tour of duty, shown here temporarily refueling at an abandoned German airbase in Auxerre, France, in January 1945.
Patton had just liberated the town, and after some delay, parted with some precious tank fuel to allow the grounded squadron of 3 P-51s to return to Leiston after burning their fuel up dogfighting with Me262 jets.
The exhaust soot on the fuselage was the result of Major Peterson chasing a jet in a full throttle dive to 700mph at 25,000ft, losing aileron control when encountering compressibility at the sound barrier, and regaining control by throwing the prop pitch to minimum which forced the engine RPMs to scream over the tachometer's redline, but broke up the air and allowed him to pull safely out of the dive with his trim tabs. The soot is likely the forced engine oil and unburnt exhaust from the redlining. The squadron followed the jet to its Lechfeld, Germany base where they split into pairs and circled "fence post high" around each end of the runway, awaiting the jet and dodging anti-aircraft gunnery. Major Peterson's wingman, Roland Wright, flying "Mormon Mustang", shot the jet down, and they ended up in Auxerre where they finally ran out of fuel.'


Saturday 17 March 2018

Takom 1/35 Leopard C2 finished

I've finally finished this one that was started in July 2017, a Canadian Leopard C2;


Weathering has been kept to a minimum as the photographs I have been using show them to be fairly clean.

Thursday 15 March 2018

Minart T-55A early Mod 1965

As you may recall I built the Miniart T-55 for The Modelling News recently so here's the link to the build review as if you have the kit (or any other Miniart T-55's) you may find it useful;

The Modelling News


Tuesday 13 March 2018

Takom 1/35 Leopard C2

This has been on the bench for long enough so it's time to get it done;


This will NOT be heavily weathered as from the photo's that I'm basing it on Canadian Leopards (apart from being on exercise) seemed to be relatively clean. I did want to do an actual vehicle but the marking option in the Takom kit is for an 'OPFOR' vehicle and apparently spurious plus the decals were crap anyway.
Using the reference photos from the dvd 'Canadian Leopard C1 & C2 Project which is available here Canadian Leopard C1 & C2 Project I'll finish the model as a lightly weathered vehicle.

Saturday 3 March 2018

Airfix 1/48 P-51D Mustang

With the T-55 built I came back to the P-51 as it's another I want off the bench as the queue of stuff I want to build is getting longer.
I've managed to glue all the control surfaces on and although the fit of the tail wings looked OK on top, underneath the joints were pretty horrendous with large gaps to fill so these, along with the joints around the nose were filled with Mr Surfacer 1000 and left to set before lightly sanding and finally polishing with a ladies nail buffer (these things are invaluable for model making);


Panel lines were restored by using electrical tape as a guide then re-scribed, liquid glue was then brushed over them to clean out the swarf. I used to use Dymo tape for this but it doesn't seem to stick as well plus it's much thinner these days so the electrical tape makes a decent substitute. 
So far it's not a bad kit and the build is nearing completion but I'm still surprised about the fit of some parts, it will be interesting to see how the new Airfix Sea Fury shapes up in this regard.

Miniart T-55A early Mod 1965

I finally finished the build. YAY! For more information about how it went together please keep an eye out for the full build review here;

The Modelling News

Here's a teaser pic for you because I'm so nice :o)